Merrsonn 44 build

Tips and tricks for Star Wars-related costumes and props. Armor builds and other SW costuming questions and answers.

Moderator: Garrison Officers

Post Reply
User avatar
seven skulls
501st Member
501st Member
Posts: 584
4poziom.waw.pl
Joined: Fri Jul 17, 2009 9:13 pm
501st Legion ID: 6773
Location: Racine, WI.

Merrsonn 44 build

Post by seven skulls »

The Merrsonn 44 and the Power 5 seem to be pretty close to the same thing in the few pictures I have found of them. I have a left hand view of the Power 5 and a right hand shot of the Merrsonn 44. That will have to do.
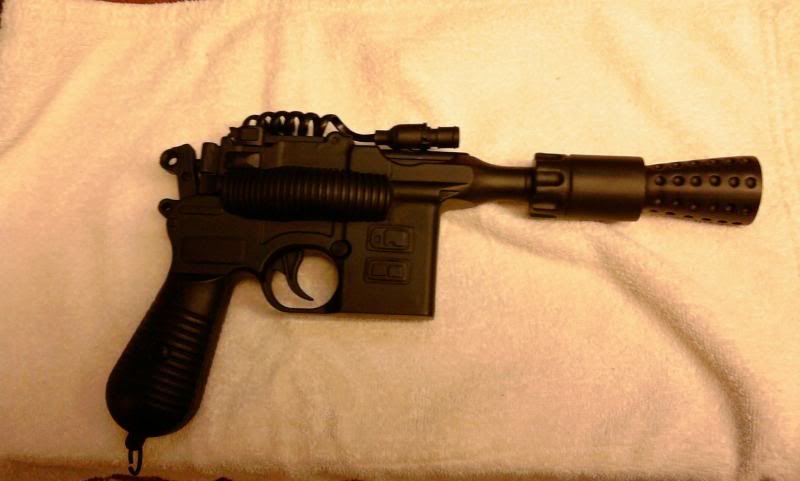
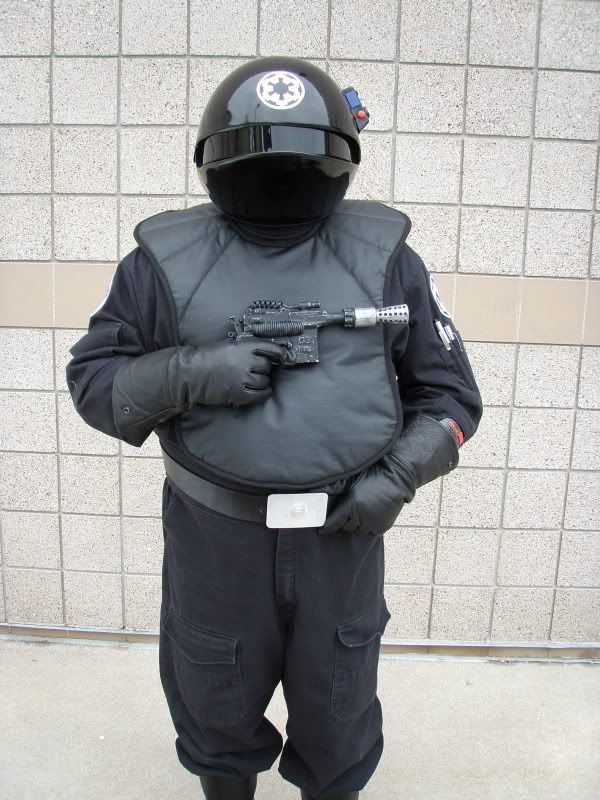
While at Wizard World last summer I noticed an airgun broomhandle Mauser that looked as if it would be a great beginning to this build. It cost $39.99. I had ordered my TI armor already and was looking for a pistol that the pilots might carry.
FF to present time. I have been putzing around with the build for a long time. I have heard the word that my armor will be shipping soon. Hooray!
I like my gunner armor but the TI was my first love :thumbsup:
Got to get the ball rolling.
Now where did I start...
Image
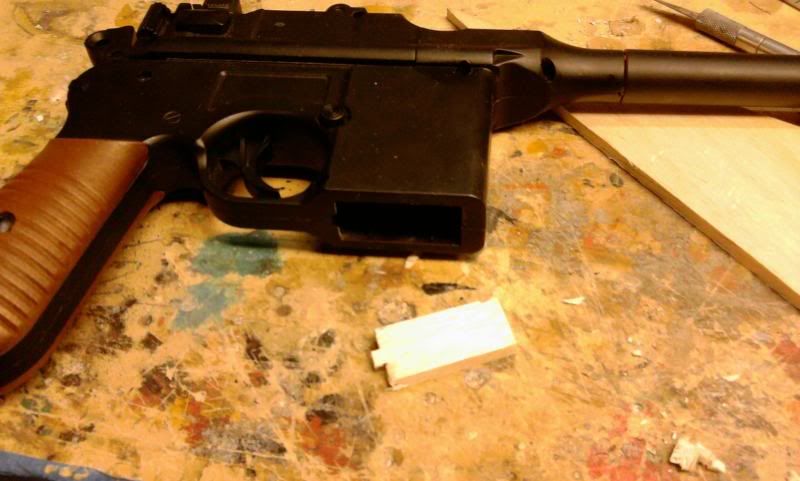
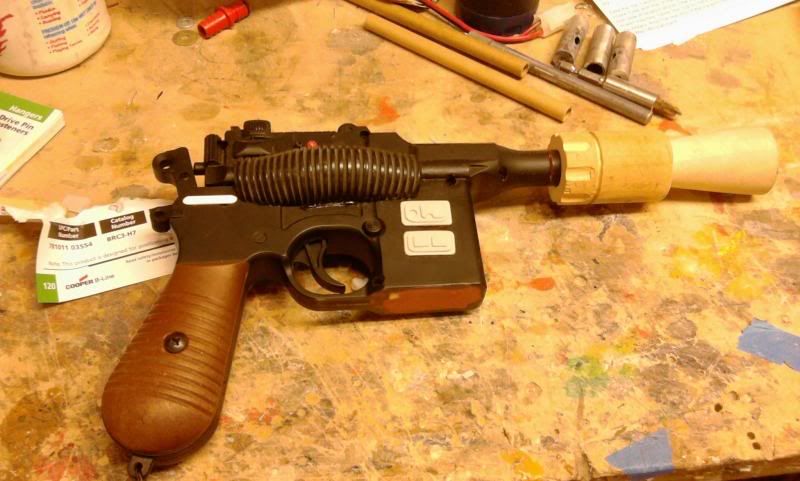
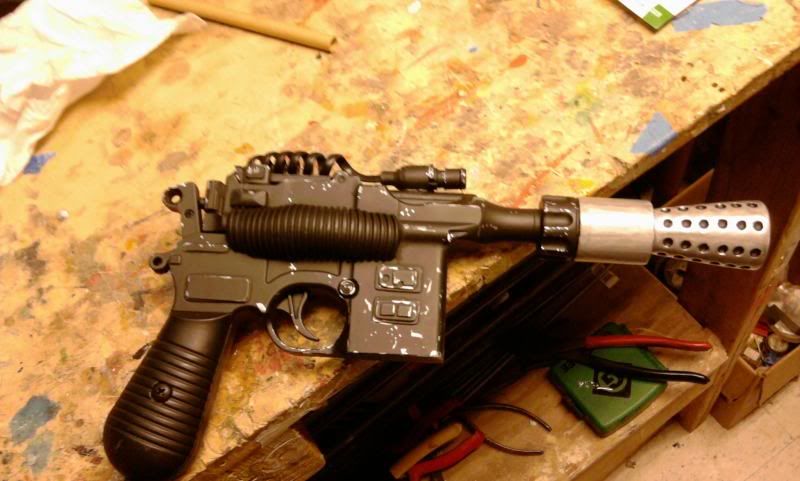
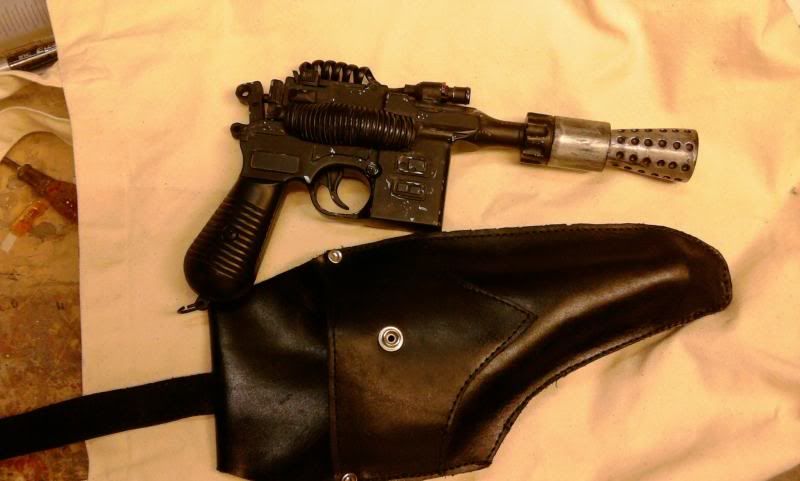
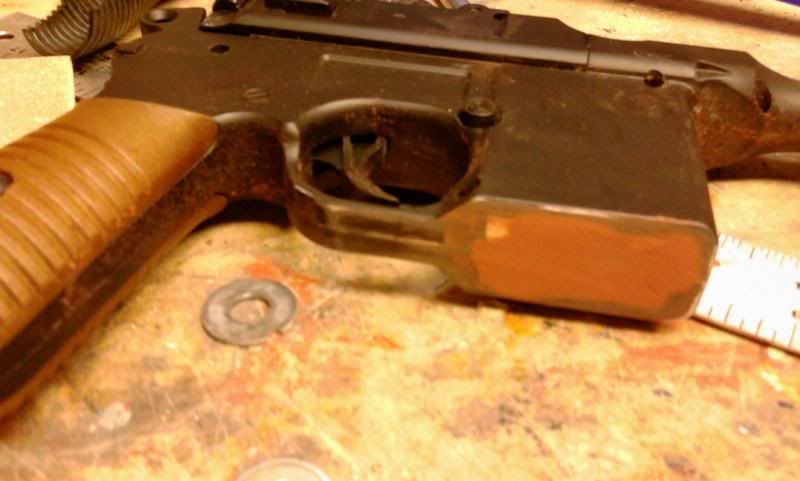
The air pistol has a magazine that doesn't belong on the 44 or power 5. Blocked it out with a scrap piece of 1/4" balsa and filled the grain with some putty. I made a greeblie out of some washers for the left side of the gun and added the cooling fins using some electrical split loom tubing. Then pretty much put it away for a while. Until this week
Image
Image
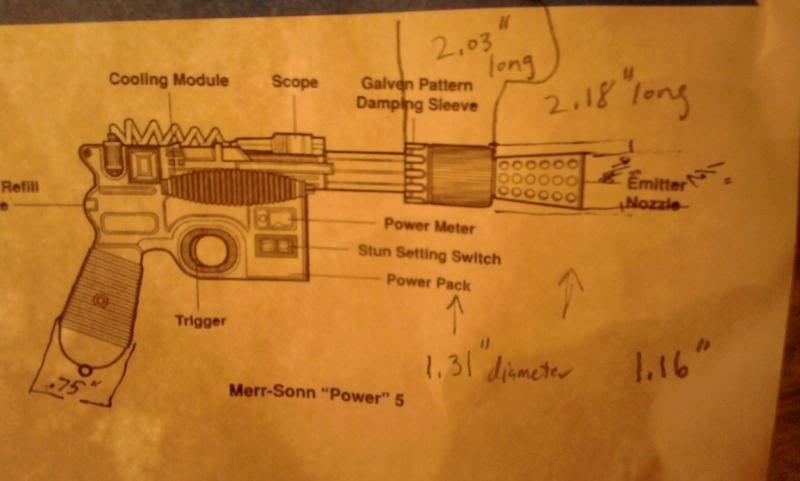
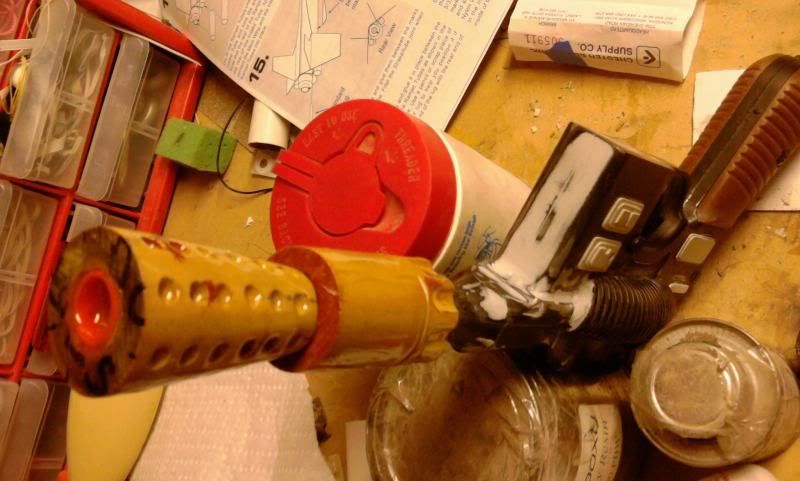
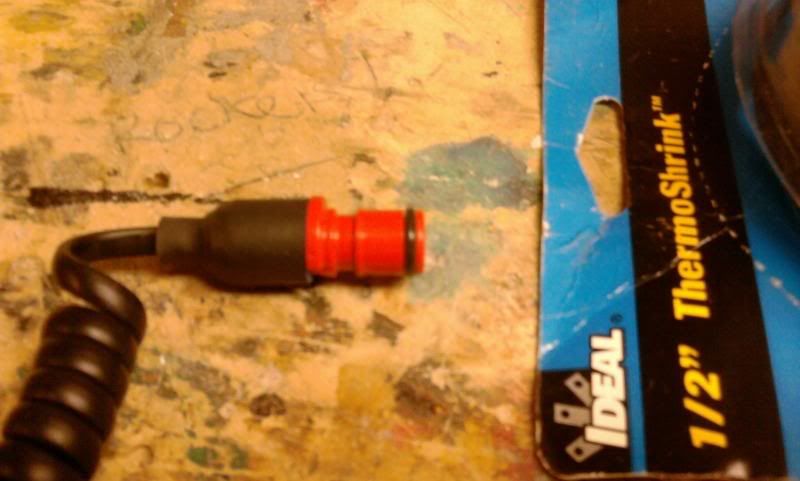
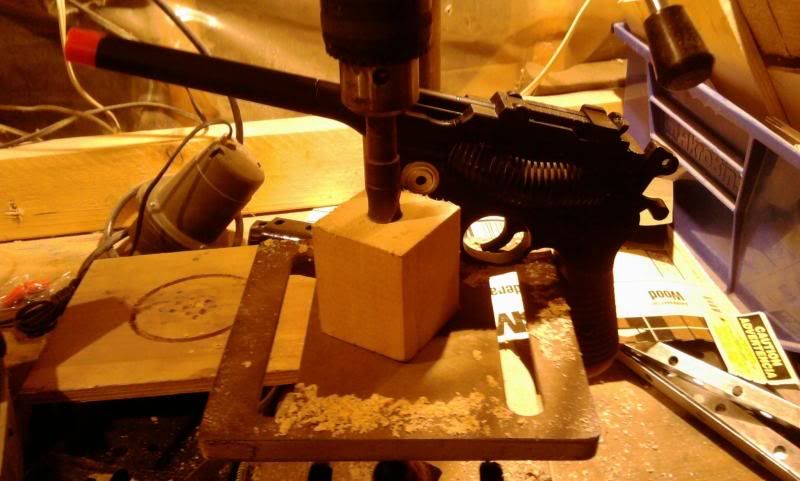
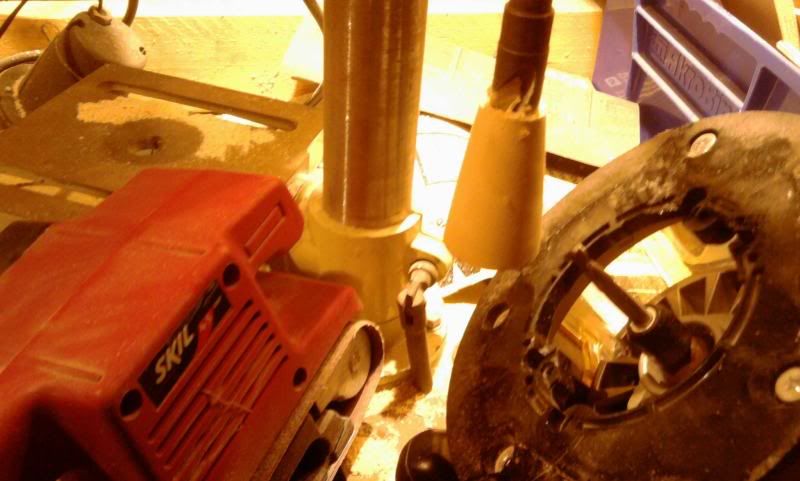
Noone has a lathe that I know so how do you make a conical emitter for the end of the gun barrel? This is a trick I learned from some of the rocket guys who make their own balsa nose cones on the cheap. I used a block of basswood to make the emitter, the barrel shaped damping sleeve was simply cut from a clothes hanger sized pine dowel.
The block was drilled out on my drill press to match the size of the gun's barrel. Then removed and friction fitted with masking tape back onto the drill bit to temporarily seize it onto the bit. Once the block is turning I started machining it down using a rotozip (which didn't work fast enough for me) and then my router. Once the cone was close to it's final shape I hit it with my belt sander to smooth it down to it's final proportions and give it a nice finish. Here are the before and after scenes from the shop.
Image
Image

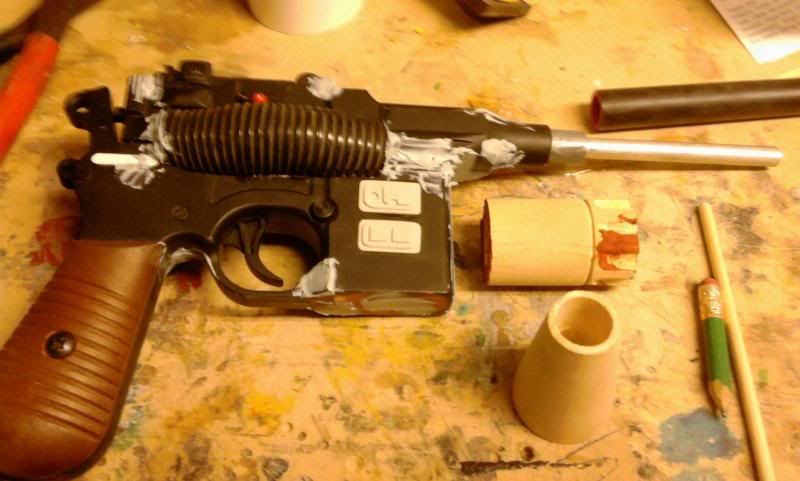
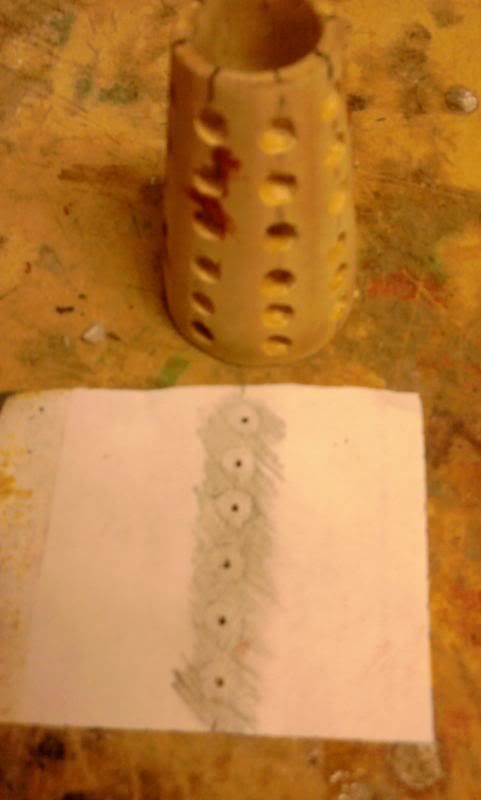
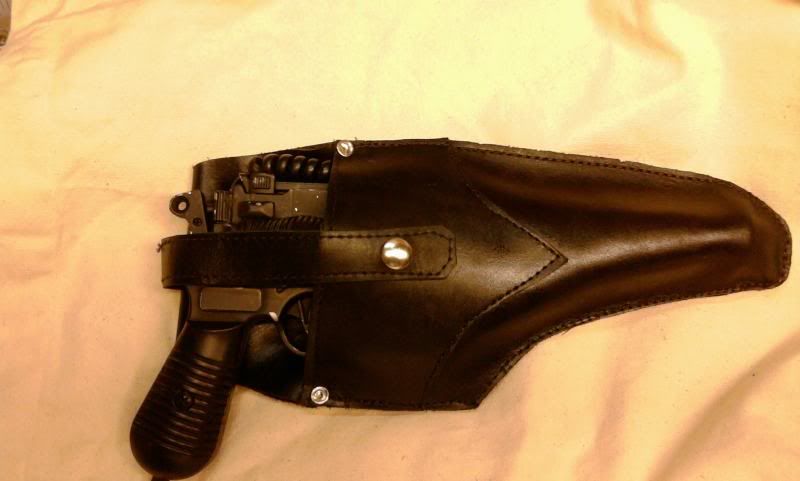
Today's job was to measure and dremel the machined line and knotches into the damping sleeve then add more of the detail pieces to the right hand side of the gun using styrene plastic bits. Its coming along pretty nice. The damping sleeve is still a bit large in diameter so I need to sand it down to size. Once I epoxy the parts onto the barrel I'll coat the wooden pieces with finish cure epoxy to give them a durable coating.
I still need to dremel in the holes into the emitter nozzle.
Image

User avatar
Rebel Doughboy
MWG Member
MWG Member
Posts: 1500
Joined: Sun Oct 04, 2009 7:14 pm
501st Legion ID: 9336
Location: In the Shadow of Giants
Contact:

Post by Rebel Doughboy »

Looking GREAT! I love the solulations and so far its superb man.
Many bothans died to bring you this post...the tearing of ligaments and almost the loss of a TK's finger...

Image

User avatar
Acrylikhan
Imperial Soldier
Imperial Soldier
Posts: 442
Joined: Fri May 26, 2006 7:21 pm
Location: Chicago, IL
Contact:

Post by Acrylikhan »

Always great to see step-by-step WIPs. Great job! Keep on posting your progress. :D
Retired from Star Wars Costuming - then again retirement is overrated

User avatar
seven skulls
501st Member
501st Member
Posts: 584
Joined: Fri Jul 17, 2009 9:13 pm
501st Legion ID: 6773
Location: Racine, WI.

Progress

Post by seven skulls »

Yes, progress is good.
The gun had a bunch of screw holes which I slapped some bondo onto.
Image

This weekend I worked on the emitter holes on the conical piece I carved out. I marked off the layout of the first set of holes and drilled them out using a screw gun and 3/16" bit. In order to make all the holes as symetrical as possible I made this paper jig up by rubbing a pencil onto the first set of holes and then used the jig to mark the other seven rows of holes onto the nozzle. Drilled them all out with some wood chipping out between a few of them but it turned out just fine after some spot putty to fill in the areas and some dremel tool wizardry to smooth it all out. I also chucked up the damping sleeve into the drill press again to reduce it's diameter to specs. I simply ran the drill press and held a piece of 60 grit sandpaper around it while it spun. It turned it down quick!
Finally I painted a watered down mix of Elmers fill and finish onto the wooden parts and sanded that out to fill the grain of the wood. After cleaning up all the holes with the dremel tool I epoxied both parts and the plastic barrel onto the gun using Bob Smith finish cure epoxy. Then painted the epoxy on the wood parts. When it dried I had a glass smooth surface which will be strong enough to survive birthday party battle damage. Next up, the scope and paint.
Image
Image
Image

Scott Goebel
Wisconsin Garrison
Ace of Aces
TI, IG 6773

the dark knight
Inactive Member
Inactive Member
Posts: 158
Joined: Wed Jul 08, 2009 11:53 pm
501st Legion ID: 9892
Location: Blue Springs, MO

Post by the dark knight »

looking good!!! :D

User avatar
Rebel Doughboy
MWG Member
MWG Member
Posts: 1500
Joined: Sun Oct 04, 2009 7:14 pm
501st Legion ID: 9336
Location: In the Shadow of Giants
Contact:

Post by Rebel Doughboy »

That's some professional looking work, skillful with a dremel, he is!
Many bothans died to bring you this post...the tearing of ligaments and almost the loss of a TK's finger...

Image

User avatar
seven skulls
501st Member
501st Member
Posts: 584
Joined: Fri Jul 17, 2009 9:13 pm
501st Legion ID: 6773
Location: Racine, WI.

Thanks,

Post by seven skulls »

Heck, You should see my Saturn 1B model rocket.
That was a labor of love.
This is going to be cool,
I'm painting it flat black right now. The scope is almost done.
Not much to the scope on this gun, easy.
More pic.s tomorrow.
Image

Scott Goebel
Wisconsin Garrison
Ace of Aces
TI, IG 6773

User avatar
seven skulls
501st Member
501st Member
Posts: 584
Joined: Fri Jul 17, 2009 9:13 pm
501st Legion ID: 6773
Location: Racine, WI.

Back to the build

Post by seven skulls »

Image

The scope was fabricated from a hose fitting I found on the ground next to a dumpster (lol) and an old phone cord, some masking tape, heat shrink. I attached it by gluing a 6/32 screw into it and drilling a hole in the top of the gun. By pinning it to the gun the scope should be durable enough for battle with a holster.

Picture of the blaster in black paint.
Image

Picture I just took this morning after adding silver detail. I still need to dry brush some details onto the silver parts and give it a touch of weathering.
Image
Image

Scott Goebel
Wisconsin Garrison
Ace of Aces
TI, IG 6773

the dark knight
Inactive Member
Inactive Member
Posts: 158
Joined: Wed Jul 08, 2009 11:53 pm
501st Legion ID: 9892
Location: Blue Springs, MO

Post by the dark knight »

wow :shock: totaly unaceptable. you must send it to me for proper disposal. just kidding! great work! 8)

Mando_TagAlong
Imperial Cadet
Imperial Cadet
Posts: 104
Joined: Sat Aug 08, 2009 11:37 pm
Location: Chicago
Contact:

Post by Mando_TagAlong »

Very nice man! Fab job with it!

User avatar
seven skulls
501st Member
501st Member
Posts: 584
Joined: Fri Jul 17, 2009 9:13 pm
501st Legion ID: 6773
Location: Racine, WI.

Done is done

Post by seven skulls »

Took a few pics at the Community Day troop in Sheboygan this past weekend.
It's nice to have a canon blaster now. I feel completed somehow.
Don't let my wife see this. :roll:

Image
Image

Scott Goebel
Wisconsin Garrison
Ace of Aces
TI, IG 6773

IronManAtArms
Inactive Member
Inactive Member
Posts: 1544
Joined: Tue May 03, 2005 5:05 pm
501st Legion ID: 1296
Contact:

Post by IronManAtArms »

Nice work man. But what are you going to do with that pea shooter. :P
"It's better to die on your feet than live on your knees."~ Emiliano Zapata
ImageImage

the dark knight
Inactive Member
Inactive Member
Posts: 158
Joined: Wed Jul 08, 2009 11:53 pm
501st Legion ID: 9892
Location: Blue Springs, MO

Post by the dark knight »

i sense a dlt-19 on the horrizon!

User avatar
Rebel Doughboy
MWG Member
MWG Member
Posts: 1500
Joined: Sun Oct 04, 2009 7:14 pm
501st Legion ID: 9336
Location: In the Shadow of Giants
Contact:

Post by Rebel Doughboy »

SWEET!!!
Many bothans died to bring you this post...the tearing of ligaments and almost the loss of a TK's finger...

Image

User avatar
Augie
MWG Member
MWG Member
Posts: 702
Joined: Thu Oct 26, 2006 10:21 pm
501st Legion ID: 9397
Location: Chicago

Post by Augie »

Awesome work!

Augie
BH9397

“It's always a Pleasure to Meet a Jedi”

User avatar
seven skulls
501st Member
501st Member
Posts: 584
Joined: Fri Jul 17, 2009 9:13 pm
501st Legion ID: 6773
Location: Racine, WI.

Holster next

Post by seven skulls »

I have a leather shop in town that caters to bikers.
She has helped 501st members in the past.
I dropped off the blaster and we talked about what the holster
might end up looking like.
I should have it in two weeks.
Image

Scott Goebel
Wisconsin Garrison
Ace of Aces
TI, IG 6773

User avatar
seven skulls
501st Member
501st Member
Posts: 584
Joined: Fri Jul 17, 2009 9:13 pm
501st Legion ID: 6773
Location: Racine, WI.

Holster

Post by seven skulls »

McNeese leatherworks in Racine, WI.
Cheryl is the lady who did the holster for me. I think it was $35 or $40.
She saved a pattern of the holster in case anybody else might want one as well?
I hit it with some leatherlac stuff I bought at the local Tandy store to shine it up.
Image
Image
Image
Image

Scott Goebel
Wisconsin Garrison
Ace of Aces
TI, IG 6773

the dark knight
Inactive Member
Inactive Member
Posts: 158
Joined: Wed Jul 08, 2009 11:53 pm
501st Legion ID: 9892
Location: Blue Springs, MO

Post by the dark knight »

cool! looks good!

Post Reply